

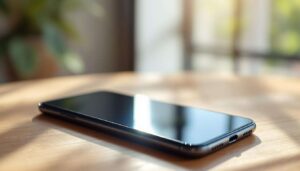
Repurposing an old smartphone as a wireless webcam has become an increasingly popular solution for remote workers, content creators, and anyone seeking better video quality than standard laptop cameras can provide. The process involves transforming a device that might otherwise sit unused in a drawer into a high-quality streaming tool. With modern smartphones boasting superior camera sensors compared to most built-in webcams, this conversion offers remarkable improvements in image clarity and colour reproduction. The setup requires minimal technical knowledge and can be completed within minutes, making it accessible to users of all skill levels.
Why turn your phone into a webcam
Superior image quality at no extra cost
Smartphone cameras have evolved dramatically, with even mid-range devices now featuring multiple lenses and advanced image processing capabilities. Most laptop webcams remain stuck at 720p resolution, whilst phones routinely capture video at 1080p or higher. The difference becomes immediately apparent during video calls, with sharper details, better low-light performance, and more accurate colour representation. This transformation essentially provides professional-grade video quality without purchasing dedicated equipment.
Environmental and economic benefits
Rather than purchasing a new webcam, utilising an existing smartphone reduces electronic waste and saves money. The following advantages make this approach particularly appealing:
- No additional hardware costs for basic functionality
- Extends the useful life of older devices
- Reduces environmental impact through device reuse
- Provides flexibility for multiple mounting positions
- Offers portability for different workspaces
Understanding these advantages naturally leads to considering what physical items you’ll need to implement this solution effectively.
Essential equipment to get started
The bare minimum requirements
The fundamental requirements remain surprisingly modest. You’ll need a compatible smartphone with a functioning camera, a stable internet connection or USB cable, and a computer to receive the video feed. Most setups work with devices running Android 5.0 or iOS 10 and above, though newer operating systems provide enhanced features and stability.
Recommended accessories for optimal results
Whilst not strictly necessary, certain accessories significantly improve the overall experience:
| Accessory | Purpose | Approximate Cost |
|---|---|---|
| Phone mount or tripod | Stable positioning | £10-£30 |
| USB cable (quality) | Wired connection option | £5-£15 |
| External lighting | Improved illumination | £15-£50 |
| Power bank | Extended usage | £15-£40 |
A flexible phone holder proves particularly valuable, allowing adjustment of camera angles without constantly handling the device. Adequate lighting makes a substantial difference to image quality, often surpassing the impact of camera specifications alone.
With the physical components sorted, the next consideration involves selecting appropriate software to facilitate the connection between devices.
The must-have apps for a successful conversion
Top-rated wireless webcam applications
Several applications dominate the wireless webcam market, each offering distinct features and compatibility options. DroidCam stands out for its cross-platform support and straightforward interface, working seamlessly with Windows, Linux, and macOS. The application offers both free and paid versions, with the premium tier removing watermarks and enabling higher resolutions.
EpocCam provides excellent integration with popular video conferencing platforms, whilst iVCam focuses on low-latency transmission for real-time applications. For iOS users, Continuity Camera offers native integration with macOS Ventura and later, eliminating the need for third-party software entirely.
Comparing connection methods
Applications typically support multiple connection protocols:
- Wi-Fi connection for wireless freedom and easy setup
- USB tethering for stable, lag-free transmission
- Bluetooth connectivity as a backup option
- Cloud-based routing for remote access scenarios
Wi-Fi connections offer convenience but may introduce slight delays, whilst USB connections provide superior stability and reduced latency. The choice depends on individual priorities regarding mobility versus performance.
Once you’ve selected suitable software, implementing the actual setup becomes the next logical step.
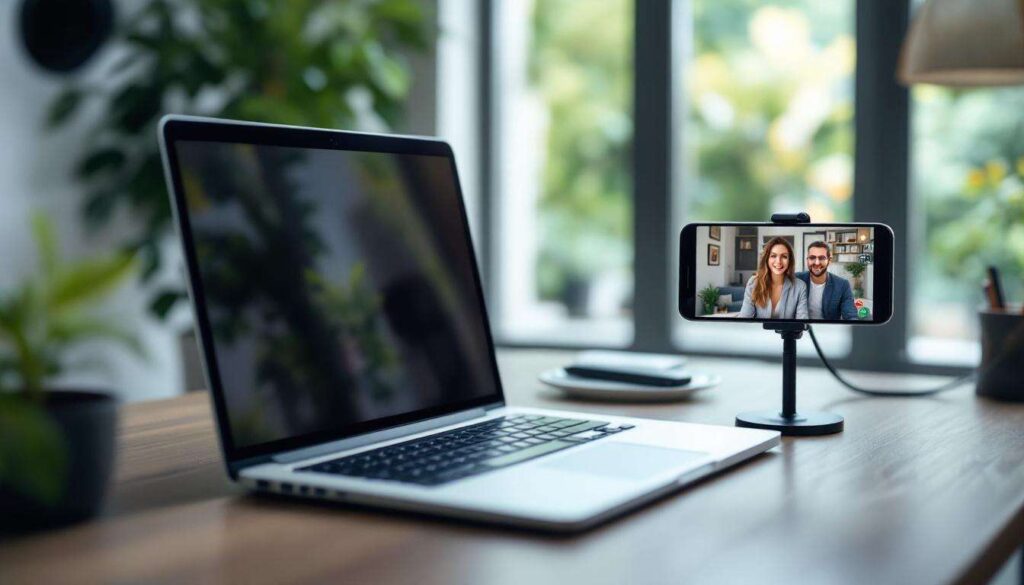
Steps to set up your phone as a webcam
Initial installation process
Begin by downloading your chosen application on both the smartphone and computer. Most services require companion software on the desktop to receive and process the video feed. Launch both applications and ensure they’re running on the same Wi-Fi network if using wireless connectivity. The phone application typically displays a connection code or IP address that must be entered into the desktop client.
Configuration and testing
After establishing the initial connection, configure the following settings:
- Select preferred resolution and frame rate
- Choose front or rear camera orientation
- Enable audio transmission if required
- Adjust exposure and focus settings
- Test the feed in your video conferencing software
Within video calling applications like Zoom, Microsoft Teams, or Google Meet, navigate to settings and select the newly installed virtual camera as your video source. The phone’s camera feed should appear immediately, confirming successful integration. Conduct a brief test call to verify both video and audio functionality before important meetings.
With the technical setup complete, attention turns to maximising the quality of your broadcasts.
Tips for optimising video and audio quality
Lighting and positioning strategies
Proper illumination dramatically impacts perceived video quality. Position your primary light source in front of you, slightly above eye level, to eliminate unflattering shadows. Avoid backlighting from windows, which creates silhouettes and forces the camera to compensate poorly. The three-point lighting technique used in professional videography can be simplified for webcam use by combining a key light with ambient room lighting.
Audio considerations
Whilst smartphone microphones often outperform laptop alternatives, they remain susceptible to handling noise and environmental interference. Consider these audio enhancement methods:
- Position the phone closer to your speaking position
- Use the phone’s wired headphones as a microphone
- Enable noise cancellation features within the app
- Minimise background noise sources
- Test audio levels before important calls
Many webcam applications include audio processing features that reduce echo and filter background noise. Experiment with these settings to find the optimal balance for your environment.
Having implemented these optimisations, practical experience reveals how the solution performs in everyday scenarios.
My impressions after daily use
Practical advantages discovered
Regular use over several weeks revealed numerous unexpected benefits. The ability to quickly reposition the camera proved invaluable for demonstrations and presentations, something impossible with fixed laptop webcams. Battery consumption remained reasonable when using USB connections, though wireless operation drained power more rapidly. The image quality improvement received consistent positive feedback from colleagues during video conferences.
Challenges and limitations
Some practical difficulties emerged during extended use. Maintaining a stable phone position required investment in a quality mount, as makeshift solutions proved unreliable. Occasional connection drops occurred with Wi-Fi setups, particularly when network traffic increased. The phone’s screen remaining active throughout calls contributed to faster battery degradation, though this could be mitigated by reducing brightness or using always-on USB power.
Despite minor inconveniences, the overall experience proved remarkably positive, with the quality-to-cost ratio far exceeding expectations. The setup became a permanent fixture in my home office, reliably serving daily video communication needs.
Transforming a smartphone into a wireless webcam delivers substantial improvements in video quality whilst making productive use of existing technology. The process requires minimal investment, basic technical knowledge, and approximately fifteen minutes for initial setup. Superior camera sensors, flexible positioning options, and environmental benefits make this solution appealing for remote workers and content creators alike. Whilst minor challenges exist regarding battery life and connection stability, these pale compared to the dramatic enhancement in video presentation quality. The combination of accessible software, straightforward implementation, and impressive results makes this conversion worthy of consideration for anyone seeking better video communication tools.